To There and Back Again and Again
The relationship betwixt Adobe Premiere Pro and DaVinci Resolve is complicated. These powerful tools complement each other wonderfully merely are constantly competing to steal each other'due south lunch.
This complicated relationship is a good matter, equally it opens upward a plethora of technical and artistic benefits to filmmakers. You simply need to understand how to make them play nice together.
Betwixt the two, Premiere Pro is arguably the more powerful (and established) editing organization. While Resolve has carried the weight of digital color grading supremacy since back in the mid-2000s.
What near Lumetri?
Of class, Premiere Pro has its ain color tools, only grading in Resolve allows for more control and thus a higher quality product. The same goes for Resolve's editing tools, which are quite capable, simply don't have the same pedigree that Premiere has built for itself over the by two decades.
As a filmmaker, your primary goal should be to provide the highest quality product with the tools and time bachelor. That usually ways you should pick the fastest and near flexible software for whatsoever given job. This often means the software you cut in is not the software yous employ to form.
Using the unique strengths of Premiere and Resolve, you can work faster, deliver better results, and focus on creativity.
In today'southward article, we'll expect at the process for round-tripping from Premiere Pro to DaVinci Resolve. We"ll highlight some of the height benefits, biggest hurdles, and fundamental tips for this mutual workflow.
Round-tripping for everyone
Information technology should get without saying that non every projection is the aforementioned. Sometimes you lot won't need Resolve'southward precise color tools, and Lumetri Color (or just a LUT) volition practice the play a trick on. Other times you might exist working on a super high-finish project in ACES that requires a different procedure than what nosotros're about to outline.
But for many of usa, this type of round-tripping between our editing bay and color suite is common. Visit practically whatsoever mail service house these days and you're bound to run into something similar at play.
That said, in that location are lots of small tweaks or extra steps dissimilar teams will utilise for this procedure. For simplicity'southward sake, nosotros're going to outline the most uncomplicated/standard process for this sort of workflow.
Timeline optimization
The first step in this process is to prep your Premiere timeline for a loftier-quality export to transfer to Resolve. Coloring is ordinarily one of the last steps in the editing procedure. So brand sure that everything is locked in the edit, and no further changes demand to be made.
Sadly, a firm sequence lock isn't always an choice. As a minimum you want to brand sure that the timeline is as close to finished as possible.
For grading, your timeline doesn't demand every layer of video, audio, VFX, and graphics available to the colorist. Loading all of these unnecessary assets into Resolve will only slow things downwards. Thankfully, we don't need every bit of it.
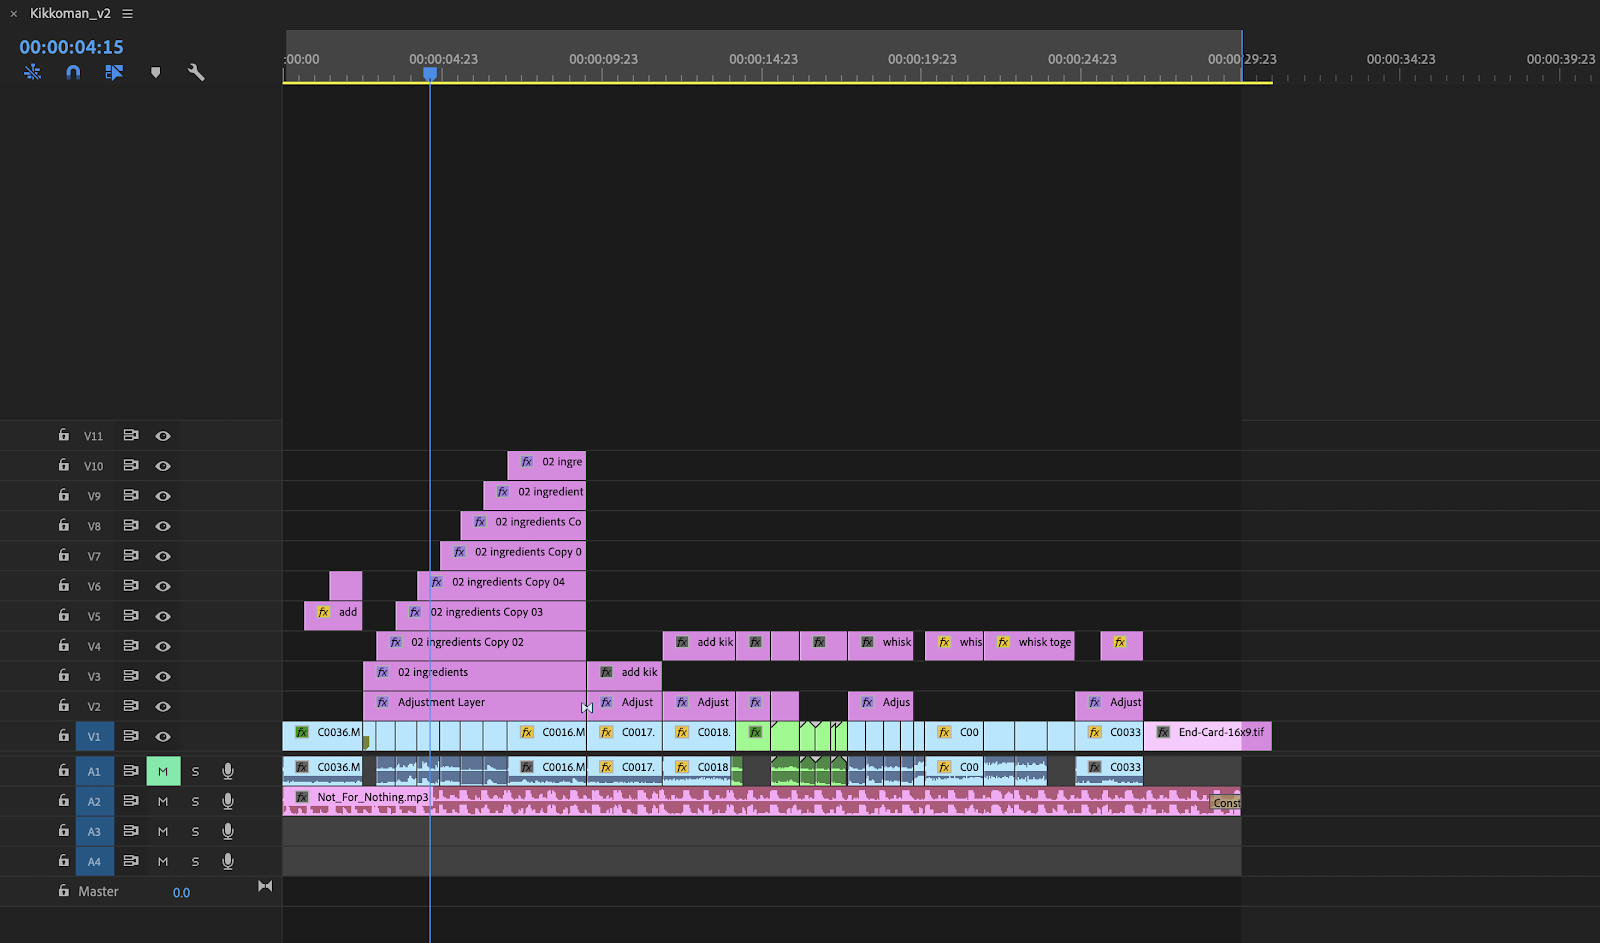
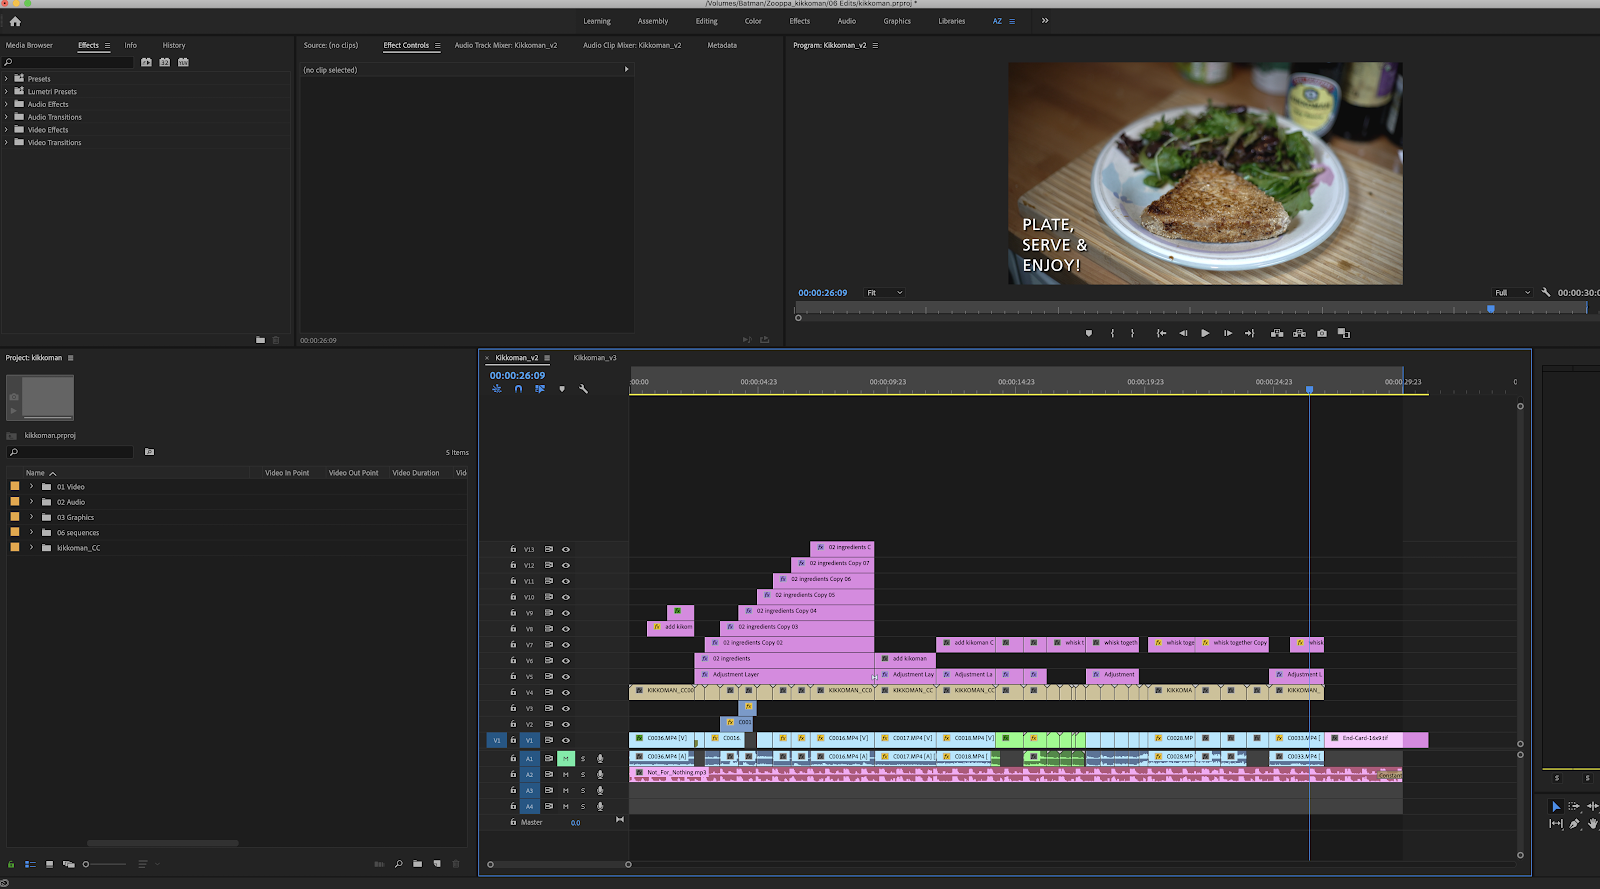
The timeline to a higher place has 10 layers of video, but the colorist only needs the main video layer (V1). Sometimes, if we have multiple layers of b-gyre (V2, V3, etc.), we can movement those layers downwards into the V1 layer and overwrite those unseen ranges of the V1 footage.
Annotation: it's a good idea to create a duplicate timeline before making any changes/flattening your timeline. Always make sure your full project is preserved intact. This ensures that any changes that need to be made to the editorial can be made prior to final export.
A step further
Yous can farther optimize the timeline by excluding text graphics, aligning layers. Even audio, if it's not critical to the colorist'due south piece of work.
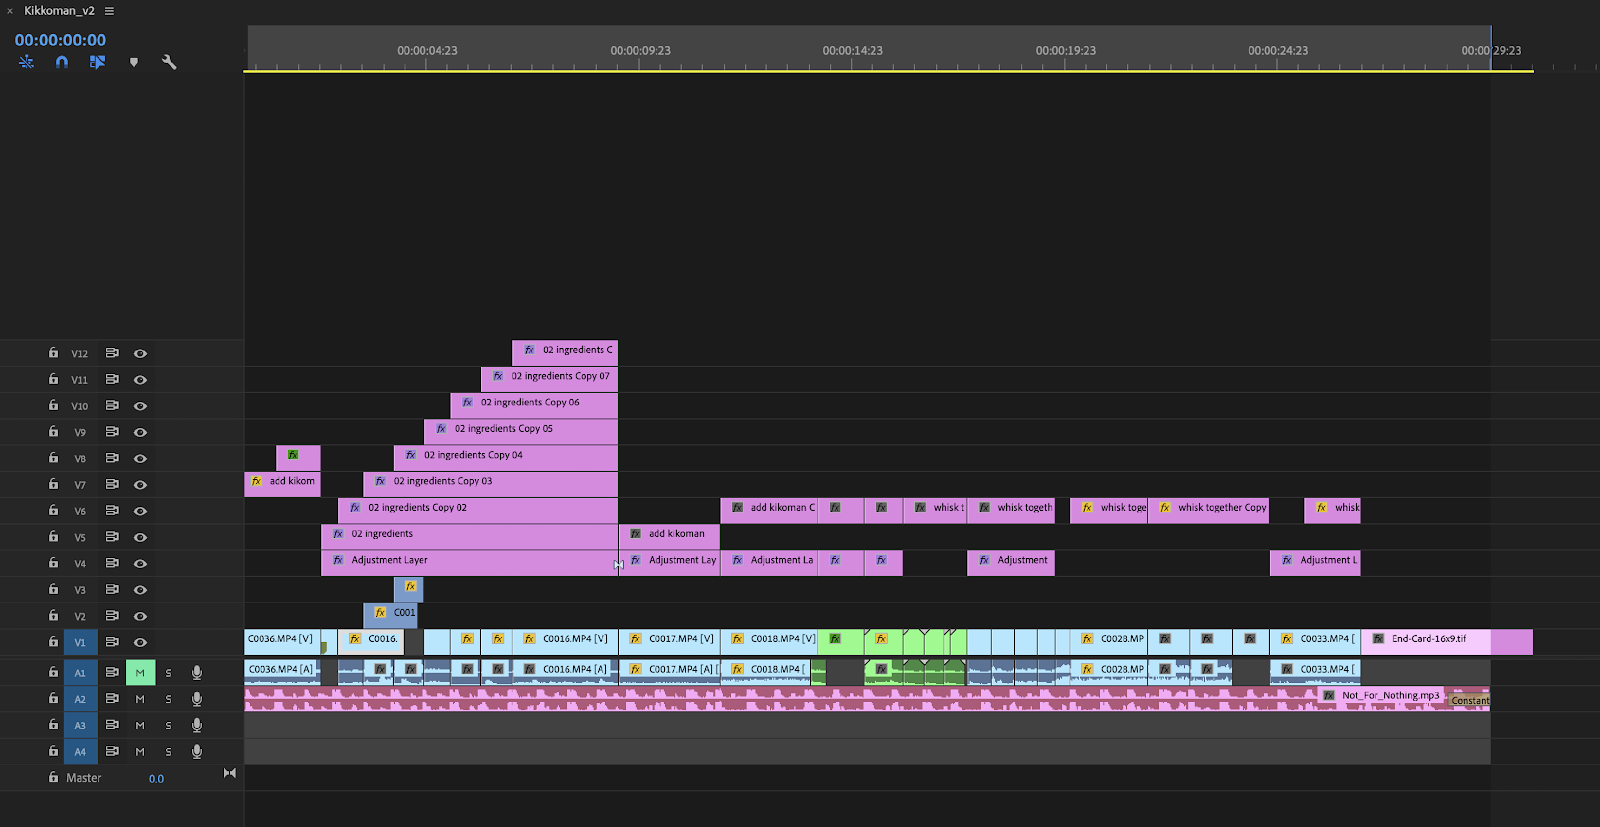
Later on the unnecessary assets are excluded, y'all tin can safely flatten the timeline into a single layer of video, and yous're set to export everything over to Resolve.
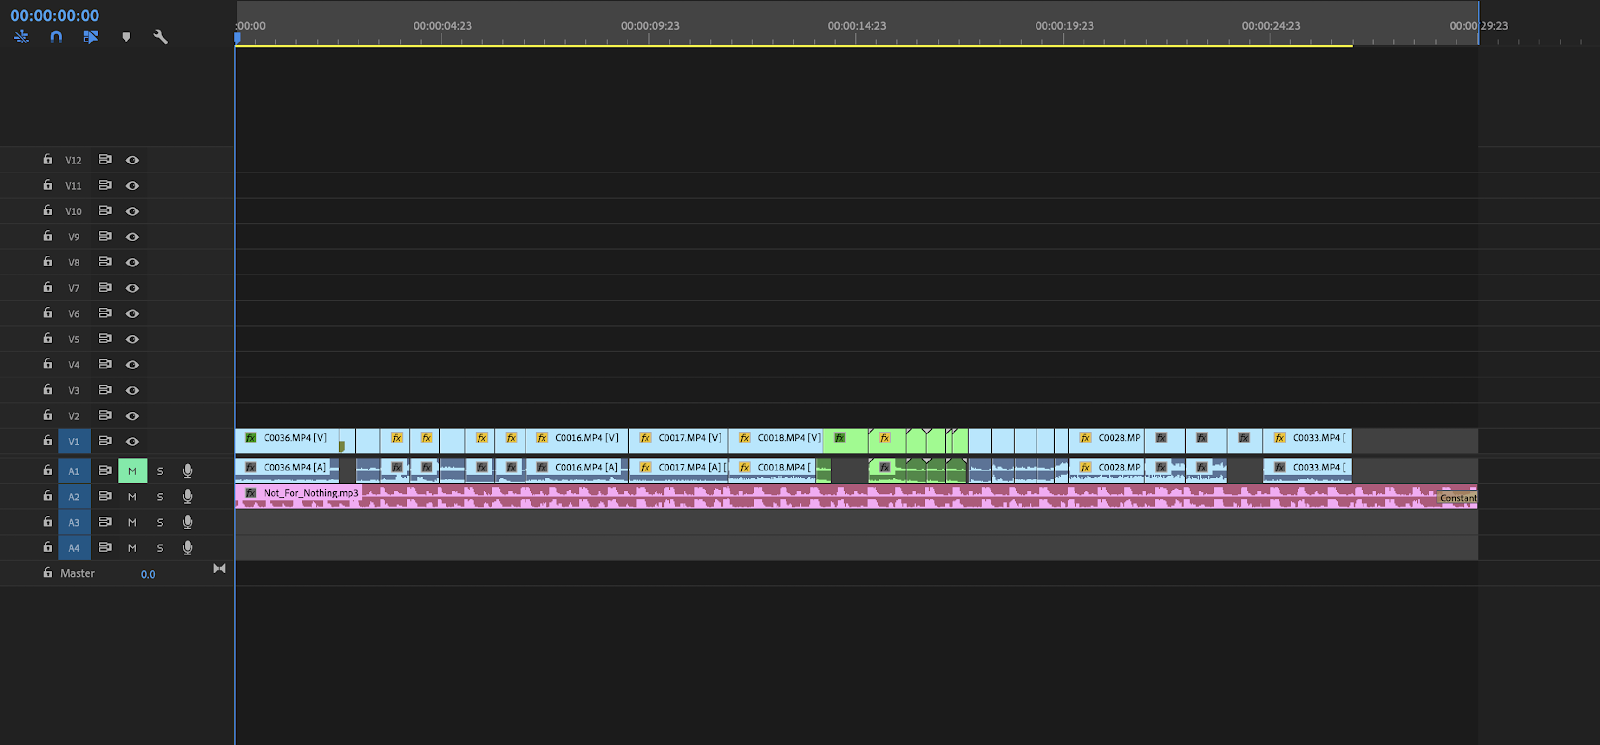
This case project has been simplified down to one layer of video and is ready for export. You should consign the sequence in whichever codec you lot're most comfortable with/your system can handle. Merely make sure information technology'due south equally high quality as possible. In this case, I exported into Apple ProRes 422 HQ simply with no sound.
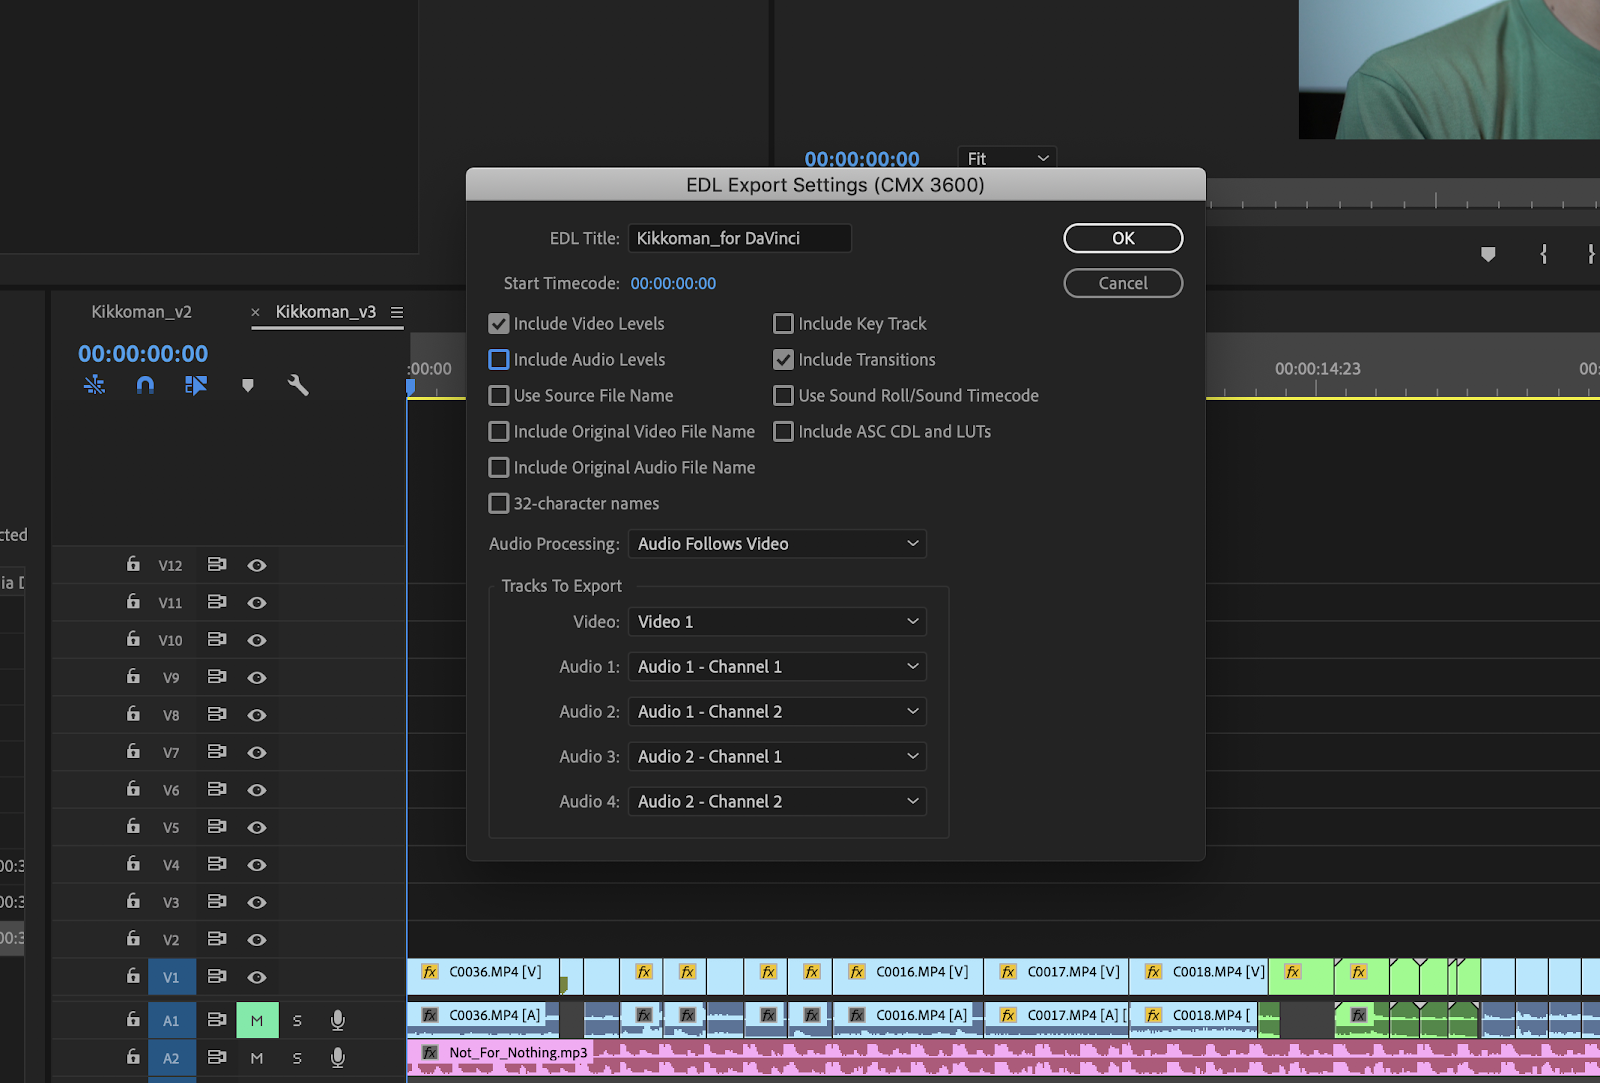
EDLs
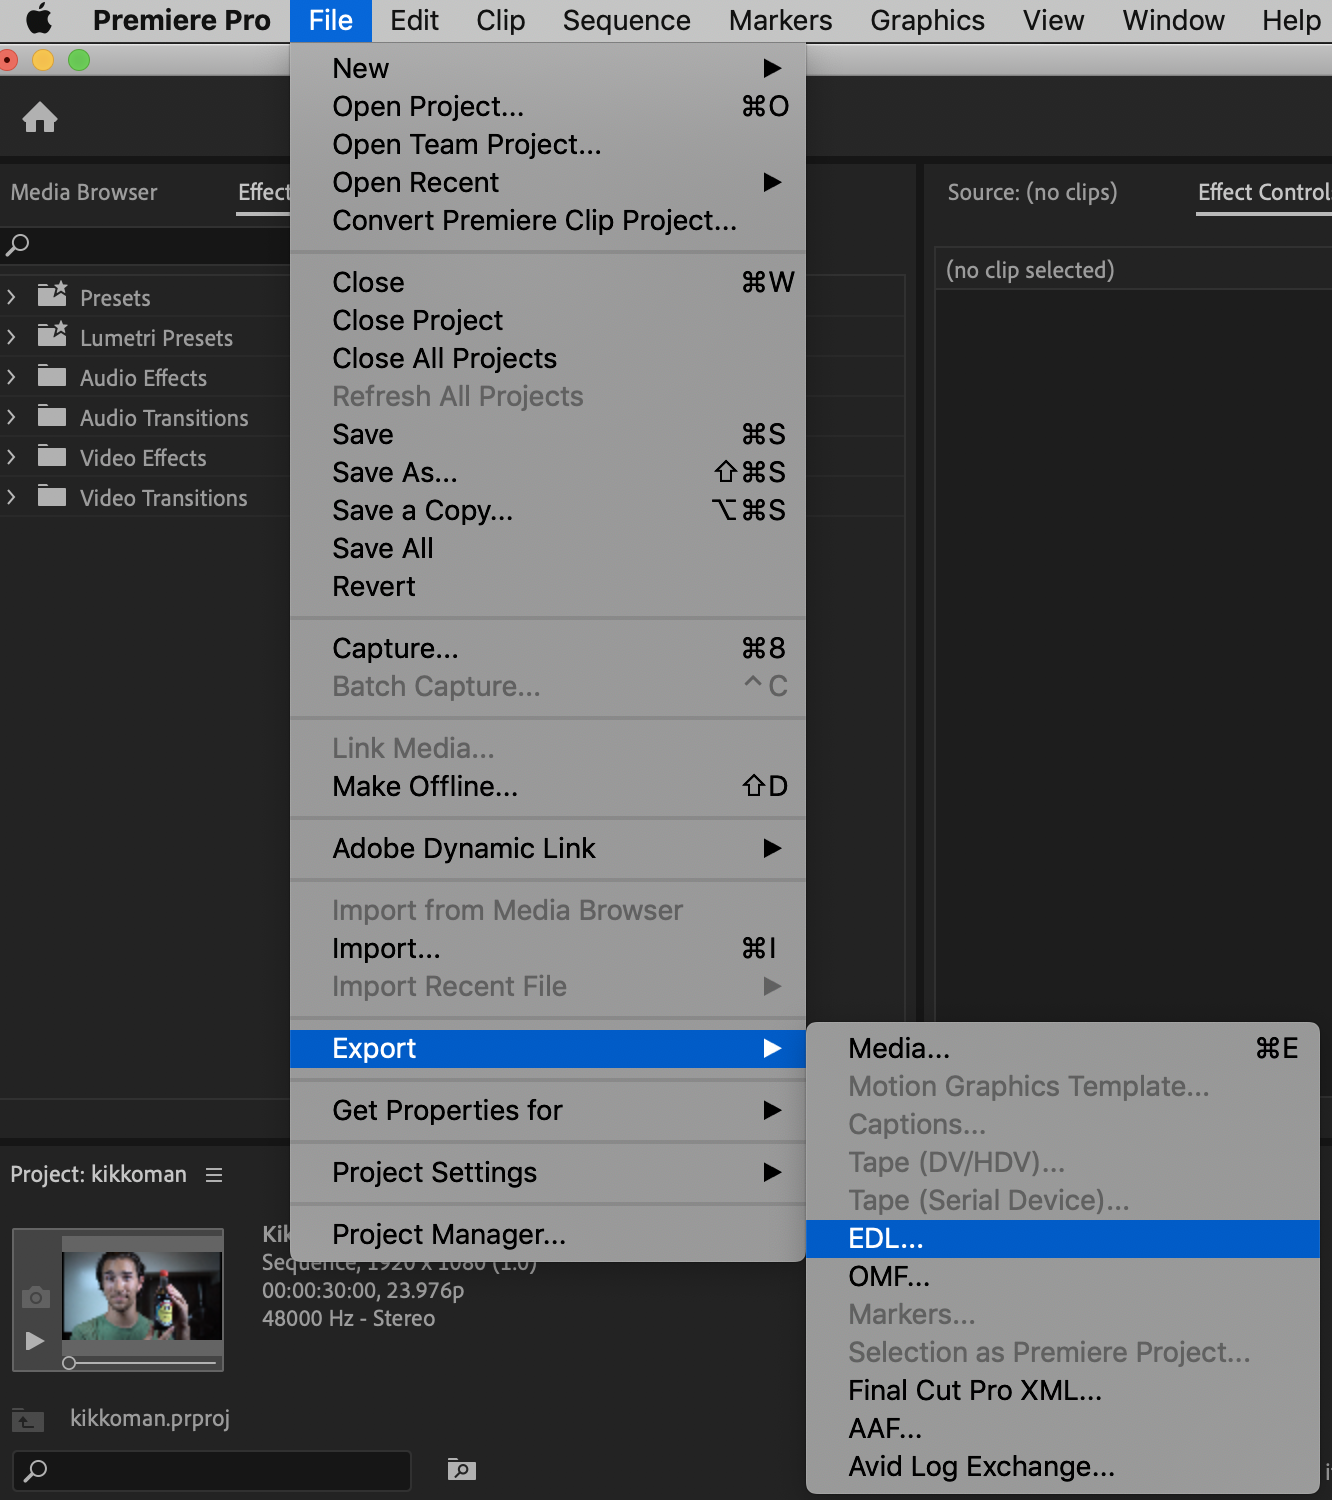
Clever readers will immediately wonder how nosotros're going to class individual shots in our timeline when nosotros just exported a full sequence. It's a proficient question. We'll demand a way for Resolve to read the exported file equally separated clips. The all-time mode to practice this by exporting an EDL from Premiere.
On the settings carte for the EDL, we won't include transitions or audio for this grade, but if you do have transitions, then the EDL will add together them equally a black clip. There are remedies for this, but you might need to do a few Google searches.
One time our EDL is exported, it's time to open our project up in Resolve. If you're new to Resolve, you'll notice it's basically another non-linear editing organization, but with a bit of a different setup from Premiere.

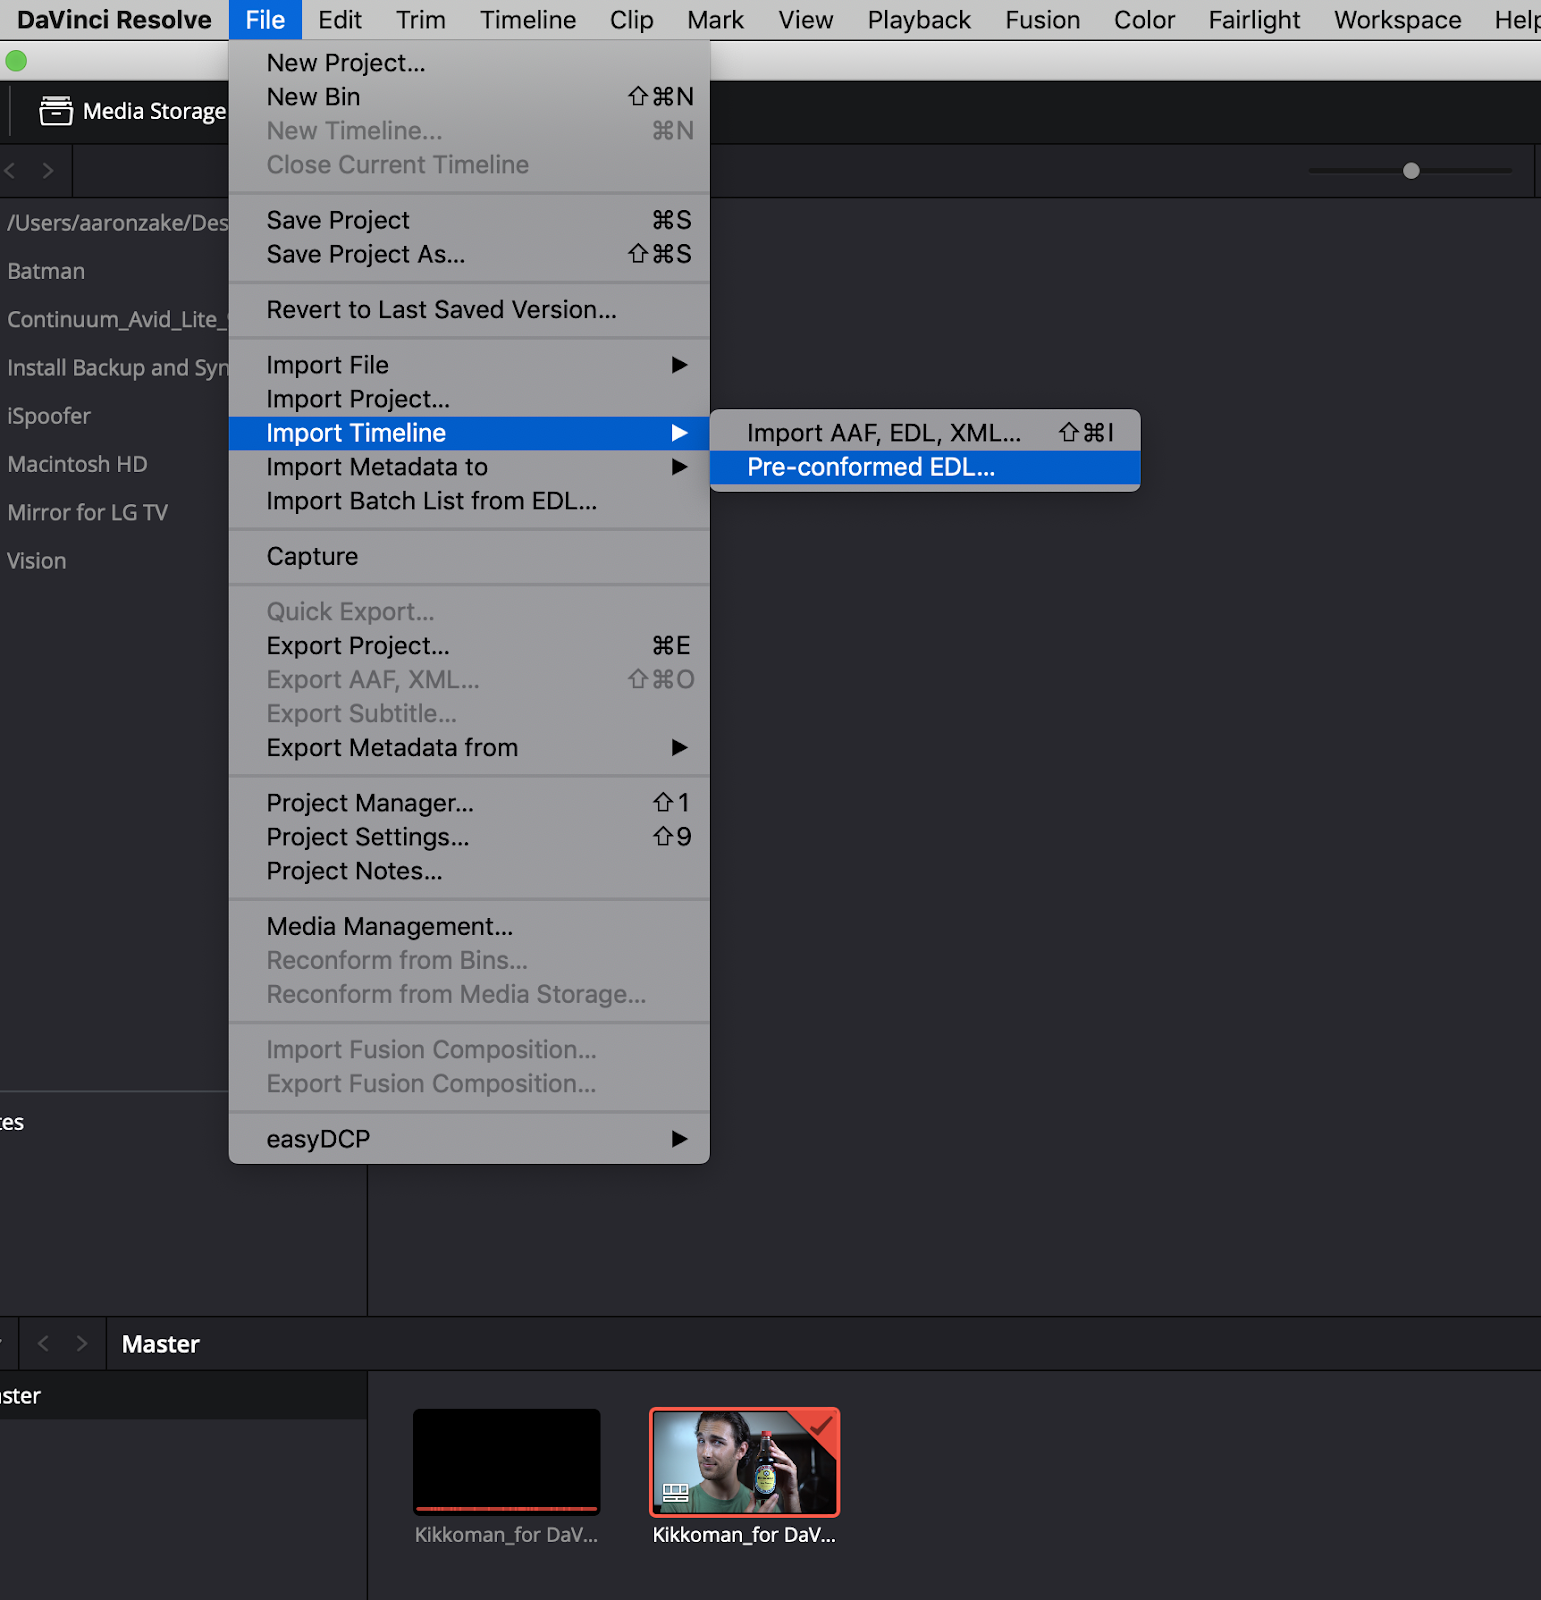
In the Media tab at the bottom of the panel, your exported video file by using the ⌘-I control. In this case, I'm importing a file called "Kikkoman_for DaVinci.mov," merely your project'due south file naming convention will vary.
Import the EDL
The next stride is to import the pre-conformed EDL that we created in Premiere. With this file, we can see all the Premiere's cuts without muddling up the timeline with Resolve's editing tools (which will exist important for when we import everything back into Premiere).
As you can encounter in the image above, the imported EDL instantly recognized the video file and creates a new timeline in Resolve to exist colored.
We tin even check to brand sure all the cuts are in the correct spots by switching over to the edit panel.
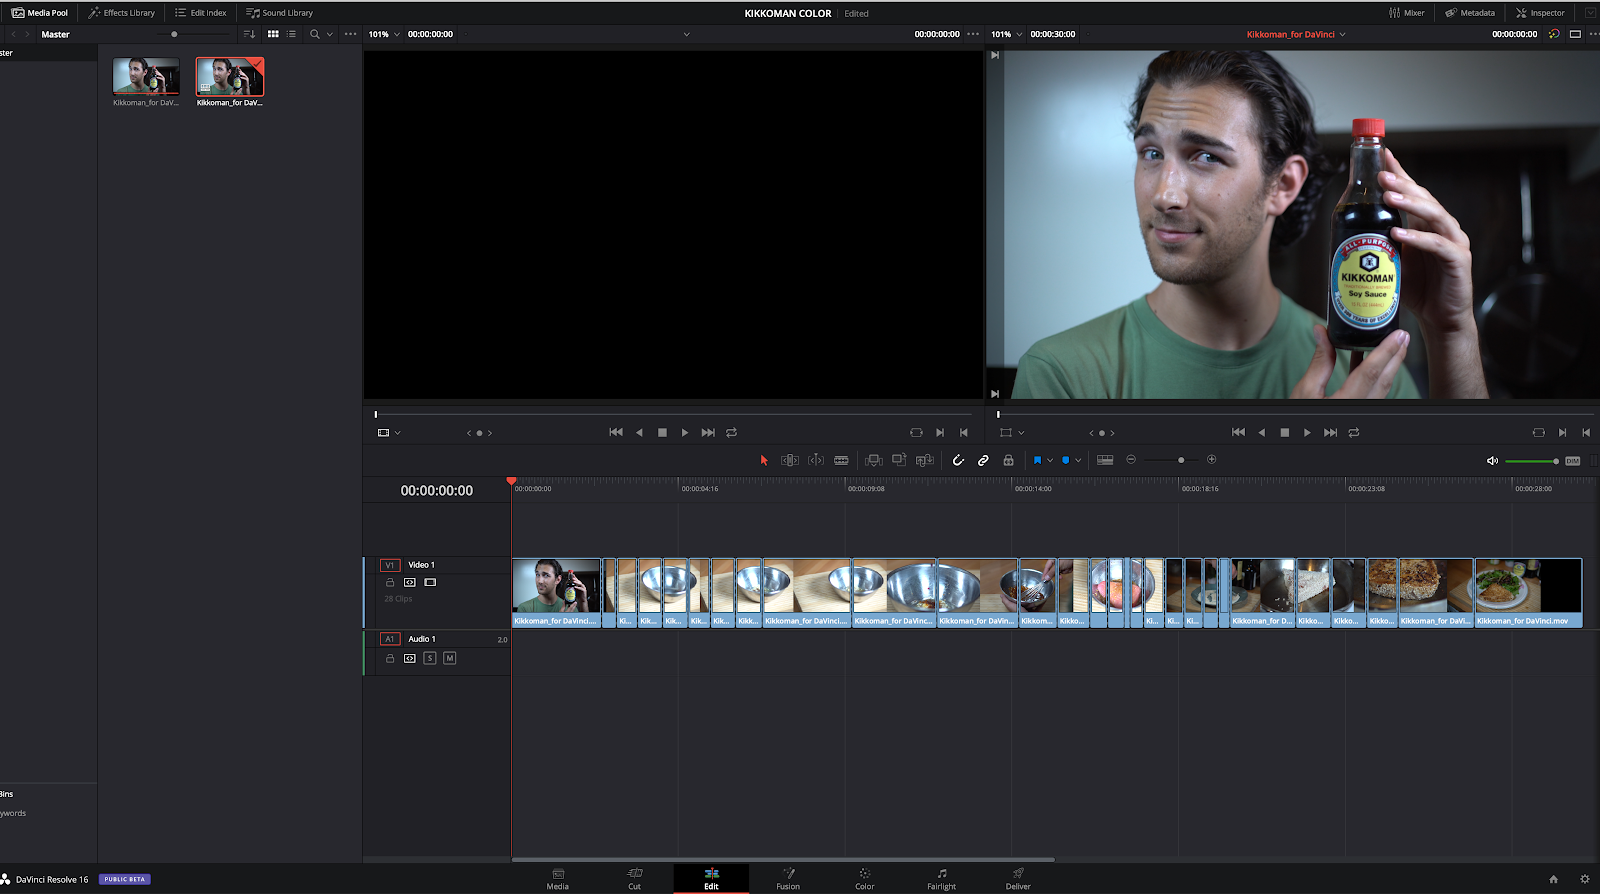
It doesn't hurt to click through the timeline just to make sure, but each cut should line upward exactly with what yous cut in Premiere.
To reiterate, if at that place was a transition similar a fade or dissolve, an additional prune will show up in the EDL. All it does is tail the transition onto the end of the relevant clip.
Start your class
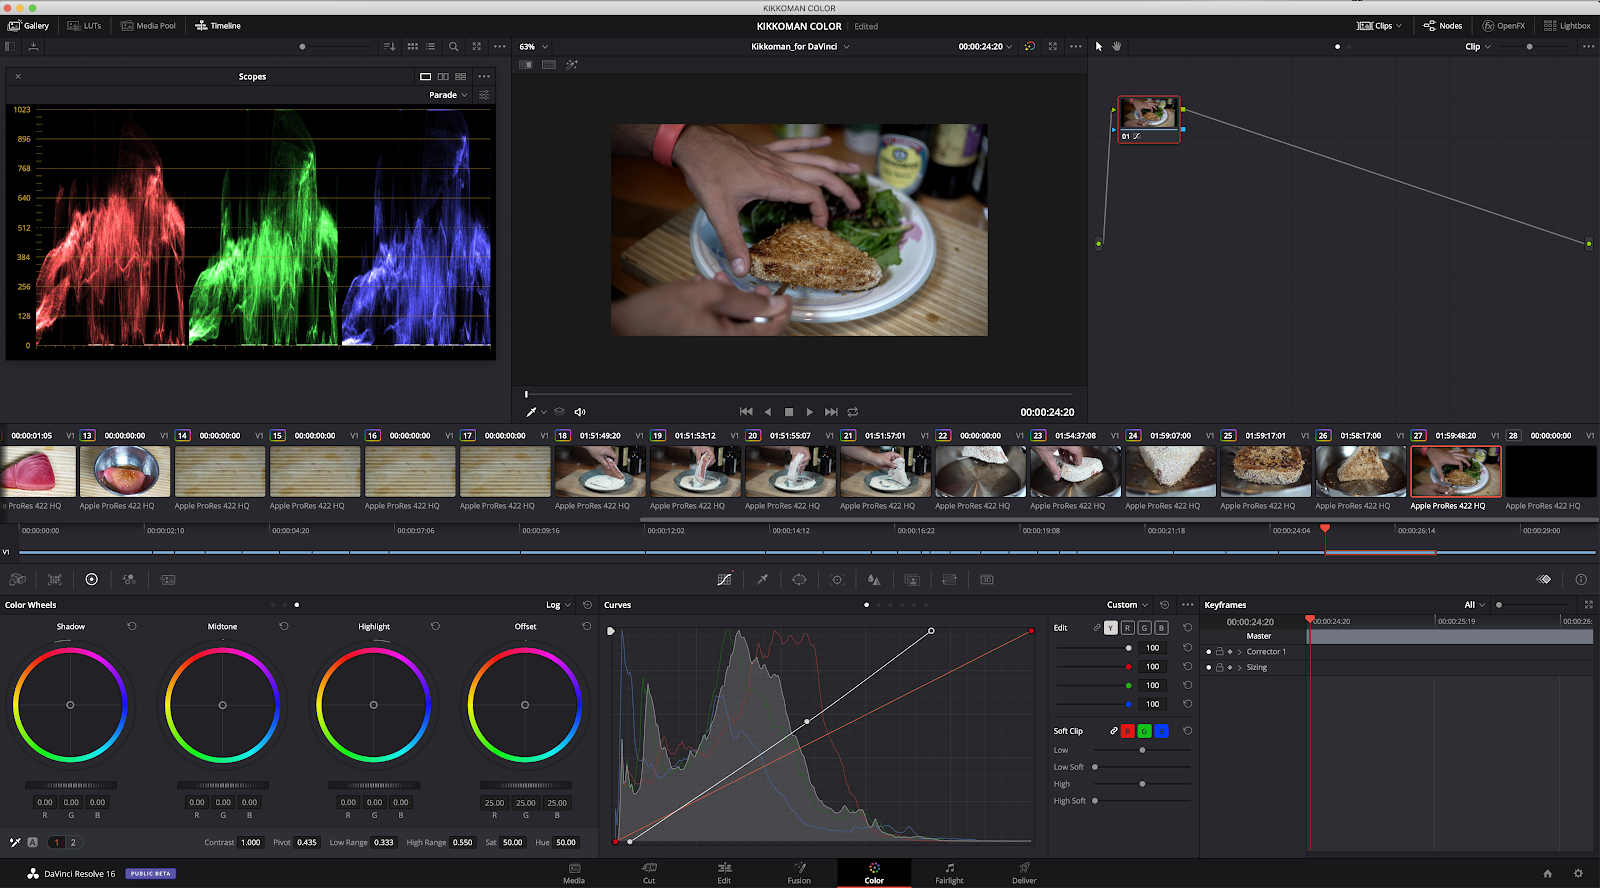
In one case you've made sure everything looks adept, it'southward fourth dimension to start your grade.
This detail video didn't need a lot of work. It was shot with a particular color profile, just the RGB levels of each clip needed to be balanced. RGB scopes accept a lot of the guesswork out of this process, so take some time to learn them.
There and back over again
One time y'all have your grade exactly as desired, it'south fourth dimension to export
There are many means to do this. We tin can export i large file of the whole graded timeline, or we tin export each clip individually with the grade practical. Having multiple files allows for easier manipulation/adjustment down the line if necessary.
From Resolve's D elivery panel, we can select how we want the export to be handled.
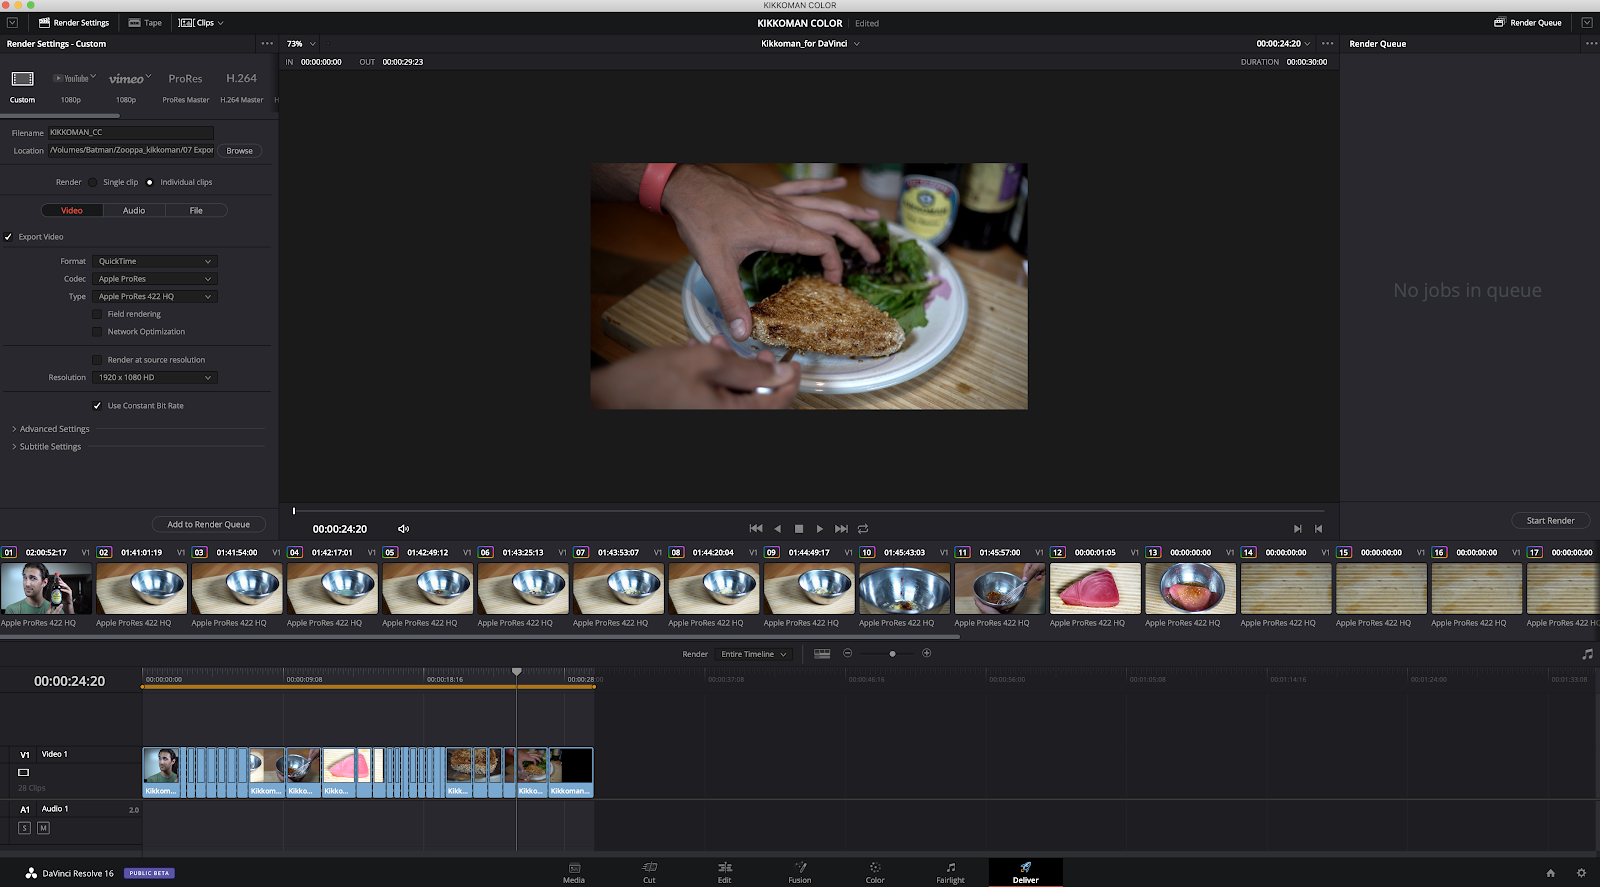
Notice in the image most we have the option to export unmarried or individual clips in the Return settings at the top of the panel.
Once you take the settings you lot want, simply click the Add together to Render Queue push button (which volition arrive announced in the panel on the right side of the screen) and so click the Start Render button. Once that is complete, nosotros're finished in Resolve and can shut it out (but retrieve to salvage your project in instance you demand to make changes to the course).
Now we're fix to get dorsum into Premiere and stop our project!
Back to Premiere
Once imported into the timeline, the files we just exported should appear in order. All y'all take to do is identify the files over the original video clips in the Premiere timeline, and everything should fit perfectly. If they do not, review the above instructions and try the consign and import again.
It can exist useful to visually distinguish these clips in your timeline, especially if multiple people are working on the projection and need to know at a glance if a prune is graded or not.
In the in a higher place example, I've color-coded the graded clips in tan, which distinguishes them from all the other assets of the timeline. Sometimes, similar if in that location is a blank space in your timeline (and thus no clip for Resolve to color course), a blackness video clip volition exist inserted in its place. This can be deleted, but make certain the newly graded clips start at the exact right frame of video, or your video could get off in its timing, which can cause lots of headaches.
Once yous've made information technology hither, it's now time to consign your video. You've successfully made the round trip from Premiere to Resolve and back once more! If yous're up for more DaVinci Resolve, why not cheque out this Beginner's Guide to Conforming With DaVinci Resolve.
Source: https://blog.frame.io/2019/11/04/premiere-to-davinci-resolve-roundtrip/
Posting Komentar untuk "To There and Back Again and Again"